Development Introduction
Let's setup the backend and frontend for development purposes.
Getting Started
We'll need a few things before we get started
What you'll need
- Node.js version 20.x or above:
- When installing Node.js, you are recommended to check all checkboxes related to dependencies.
- We'll be utilising node as our JavaScript runtime to facilitate our web frameworks.
- Docker Desktop:
- Docker will allow us to run containers of software such as popular database management systems and open source software.
- The benefit lies in being able to have consistency across devices on where the software is running. As well as the speed in which it takes to get them running
- Postgres v15.8 (via Docker):
- When pulling this to your docker, use the search bar to find
postgresand change the tag to15.8before clicking thepullbutton. If you are unable to find the specific tag, go to your terminal and enterdocker pull postgres:15.8, you'll then be able to find this image in the "Images" tab within Docker Desktop. - To provide ease of development we'll utilise this to keep consistent with our cloud hosted database version and for our testing framework.
- Setup the following two environment variables when running the image:
POSTGRES_USER,POSTGRES_PASSWORDby using the optional settings dropdown. Don't forget to enter a port to expose it under localhost.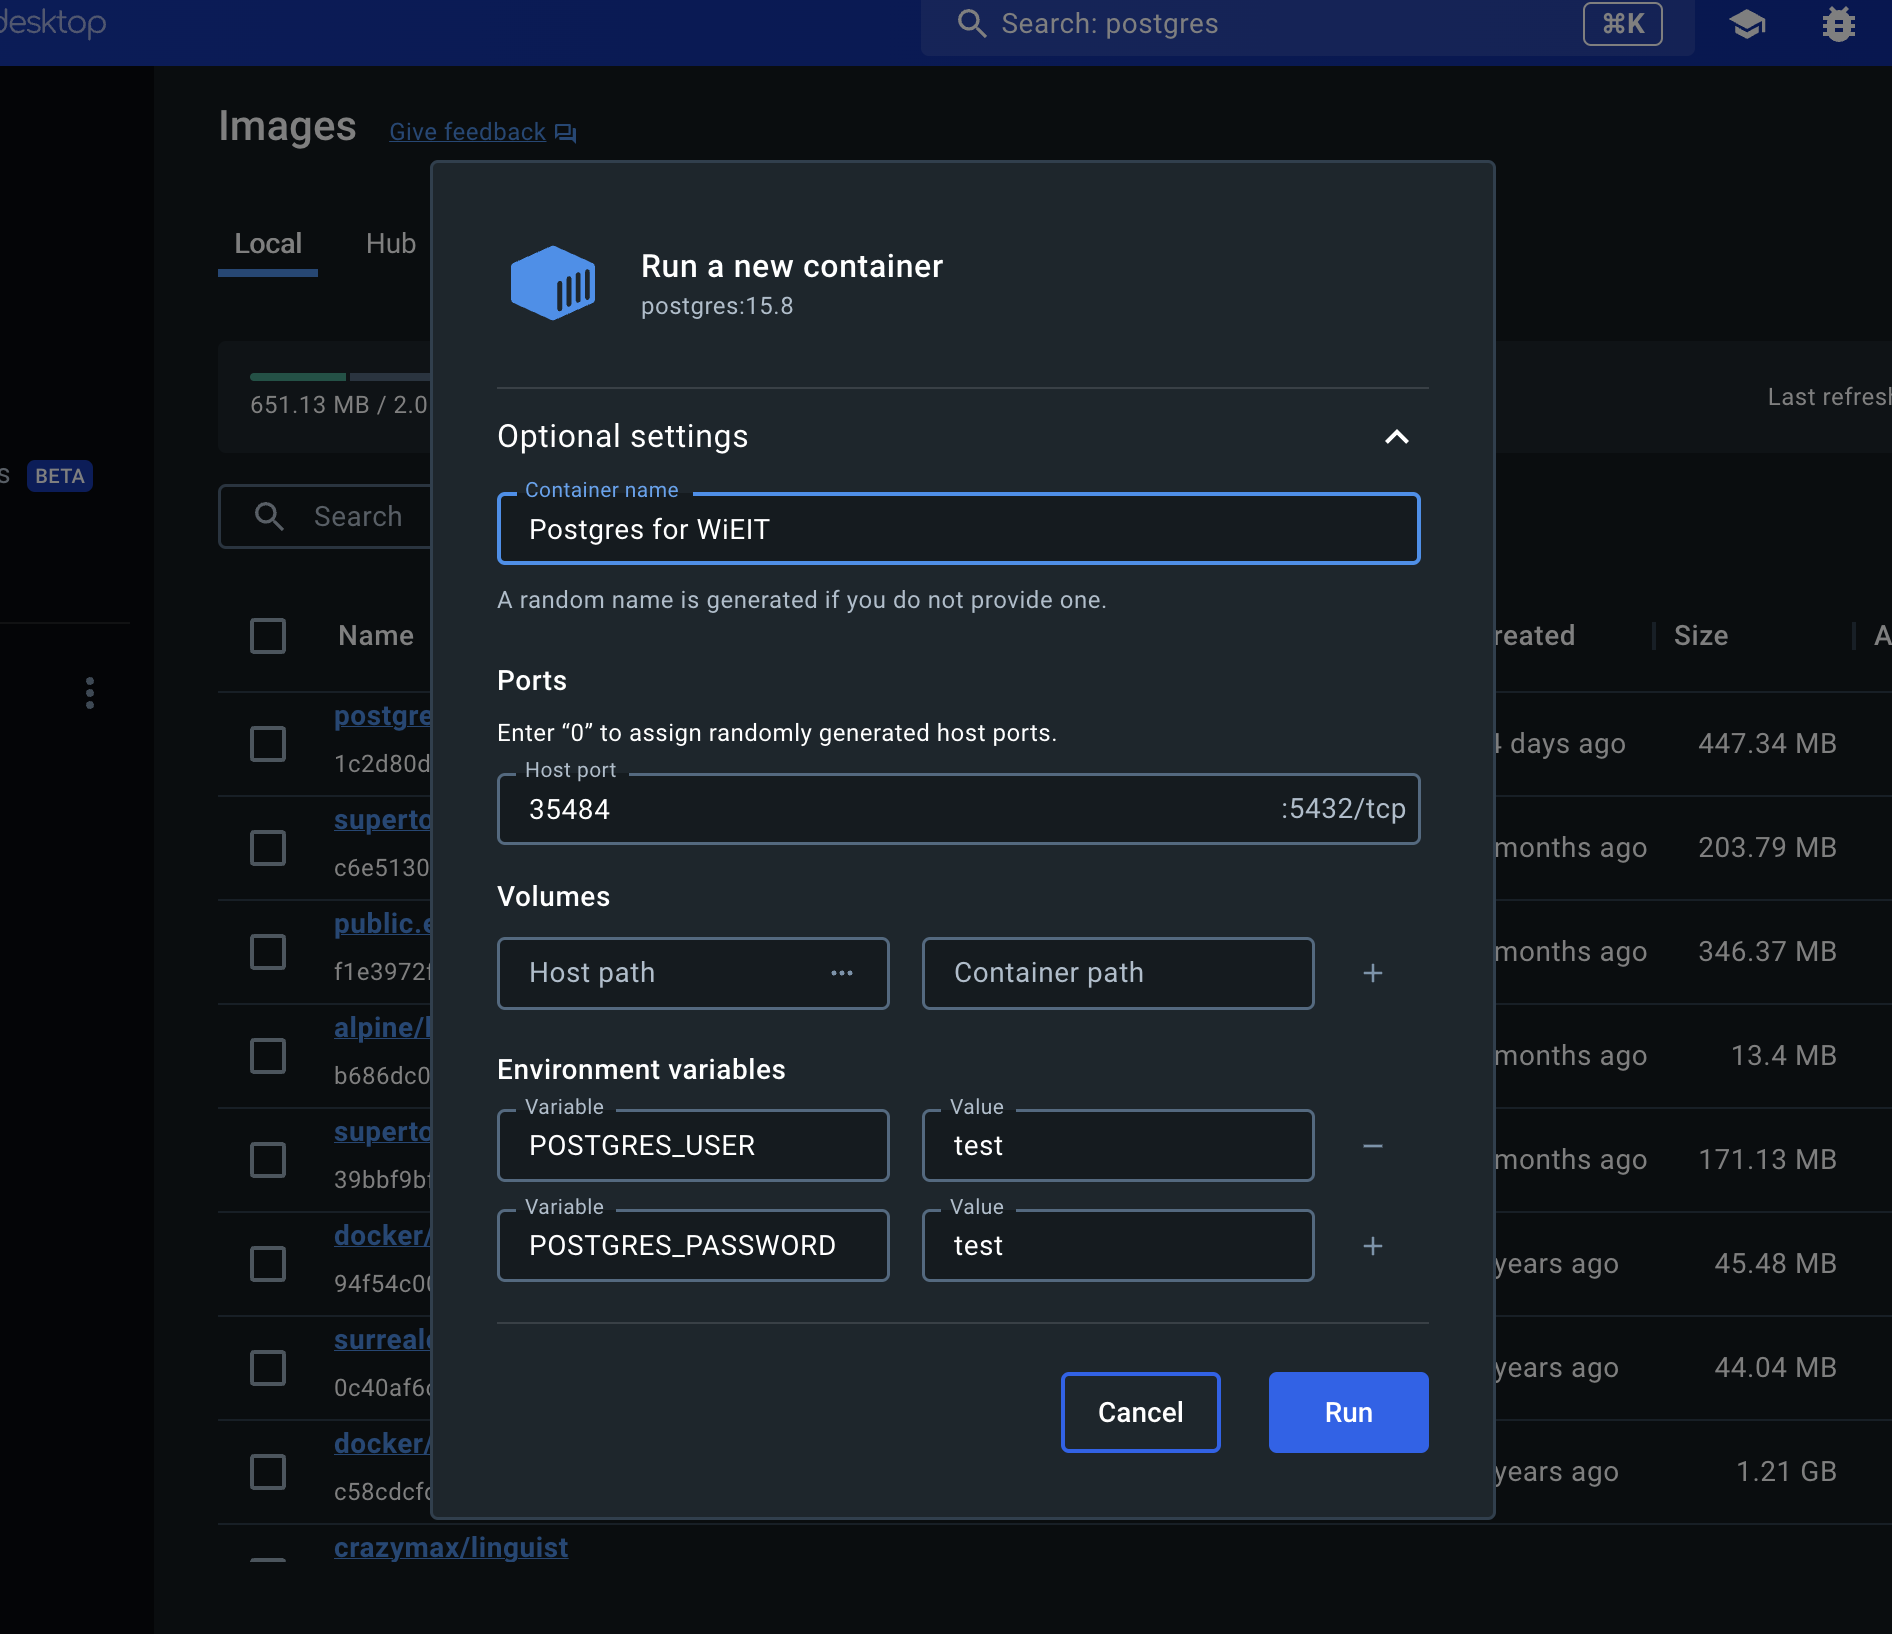
- When pulling this to your docker, use the search bar to find
- Git
- We are utilising git and github for our version control.
Run the Backend
Handing our backend server is a package called fastify. This is a web framework package allowing us to make REST focused web requests. While not limited to supporting a frontend, we'll be utilising it in this manner. The ts-node-dev package will provide our hot reloading, performing a refresh on the running server when we change our code during development.
In order to run it for development purposes we need to run the following commands in a terminal of your choice (You can type this command into Command Prompt, Powershell, Terminal, or any other integrated terminal of your code editor):
-
From the root folder, move into the backend directory with:
cd backend -
You'll need to now create a
.envfile to host your environment variables in thebackenddirectory. It must contain the following:backend\.envREGISTRATION_SECRET="SOME_COMBINATION_OF_CHARACTERS"
DB_NAME="SAME_AS_DOCKER_SETUP__PG_USER"
DB_PORT="SAME_AS_DOCKER_SETUP"
DB_USER="SAME_AS_DOCKER_SETUP"
DB_PASS="SAME_AS_DOCKER_SETUP"
DB_HOST="localhost"
PLATFORM_COOKIE_SECRET="RANDOM_32_CHARACTER_STRING"
PLATFORM_JWT_SECRET="RANDOM_32_CHARACTER_STRING"Please populate
SOME_COMBINATION_OF_CHARACTERSwith whatever you choose to make development simple, this is utilised in production for now to prevent unwarranted registrations.The other
DB_variables should be populated according to how you setup the postgres service in docker -
You can now install the required node packages to run the site. In the same terminal that is pointing to the frontend directory, run the following commands in order:
npm i
npm run dev
The
npm run devcommand builds your website locally and serves it through a development server, ready for you to view at http://localhost:3000/.
Run the Frontend
The frontend relies on the backend to function, please run it first before expecting a majority of the frontend functionality to work as expected.
Handing our frontend is a package called vite. This package allows us to focus on development and speed up our deployment process. Vite provides hot reloading for our pages, performing a refresh on the running site when we change our code during development and allows us to chunk our code for production.
In order to run it for development purposes we need to run the following commands in a terminal of your choice (You can type this command into Command Prompt, Powershell, Terminal, or any other integrated terminal of your code editor):
-
From the root folder, move into the frontend directory with:
cd frontend -
You'll need to now create a
.envfile to host your environment variables in thefrontenddirectory (we'll handle the backend separately). It must contain the following:frontend\.envSERVER_URI="http://localhost:4000/v1/" -
You can now install the required node packages to run the site. In the same terminal that is pointing to the frontend directory, run the following commands in order:
npm i
npm run dev
The
npm run devcommand builds your website locally and serves it through a development server, ready for you to view at http://localhost:3000/.